1. What’s in the box
..
You should find all the above items in your shipment. Please get in touch with the dealer if anything is missing.
2. Position the ARNE
..
The ARNE is heavy, so always have two people when lifting the unit. Place the amplifier where you intend to install it, in an open and well-ventilated area away from direct sunlight and heat sources. The ARNE stands on four feet which may be screwed on tightly for shipping. Loosen each foot until it is no longer touching the main body of the amplifier - this helps to isolate the unit from vibrations in the room. Adjust the feet individually until the amplifier is stable and sitting evenly on the surface.
3. Install the tubes
..
Allow the tubes to reach room temperature before installing them. The ARNE comes with eight tubes, which are paired and numbered according to their respective sockets as illustrated above. Wearing gloves, carefully unwrap each tube and install it into its respective socket by pressing with a gentle but firm pressure until the tube is fully inserted. All tubes are auto bias for zero adjustments.
4. Install the glass cover
..
Ensure that the rubber o-ring strips are installed along the two grooves on the front edge of the unit and the groove along the very top of the unit. Wearing gloves, gently lay the front edge of the glass cover against the front edge of the amp unit and lower it down, making sure it is resting evenly against the strips. The glass is not secured to the unit. Always take the glass cover off first before moving the unit.
5. Connect the cables and power on/off
..
1. Connect the signal cables, XLR or RCA. Due to balanced design we recommend XLR cables.
2. Connect the speaker cables.
3. Connect the power cable to the wall socket and amp.
4. Power on the amplifier.
5. When switched off, the ARNE must rest at least 5 minutes before being powered back on.
6. Control the ARNE
..
The ARNE can be controlled via the dials on the front of the unit as illustrated, and with the remote control.
7. Replacing the fuses
..
Mains fuses
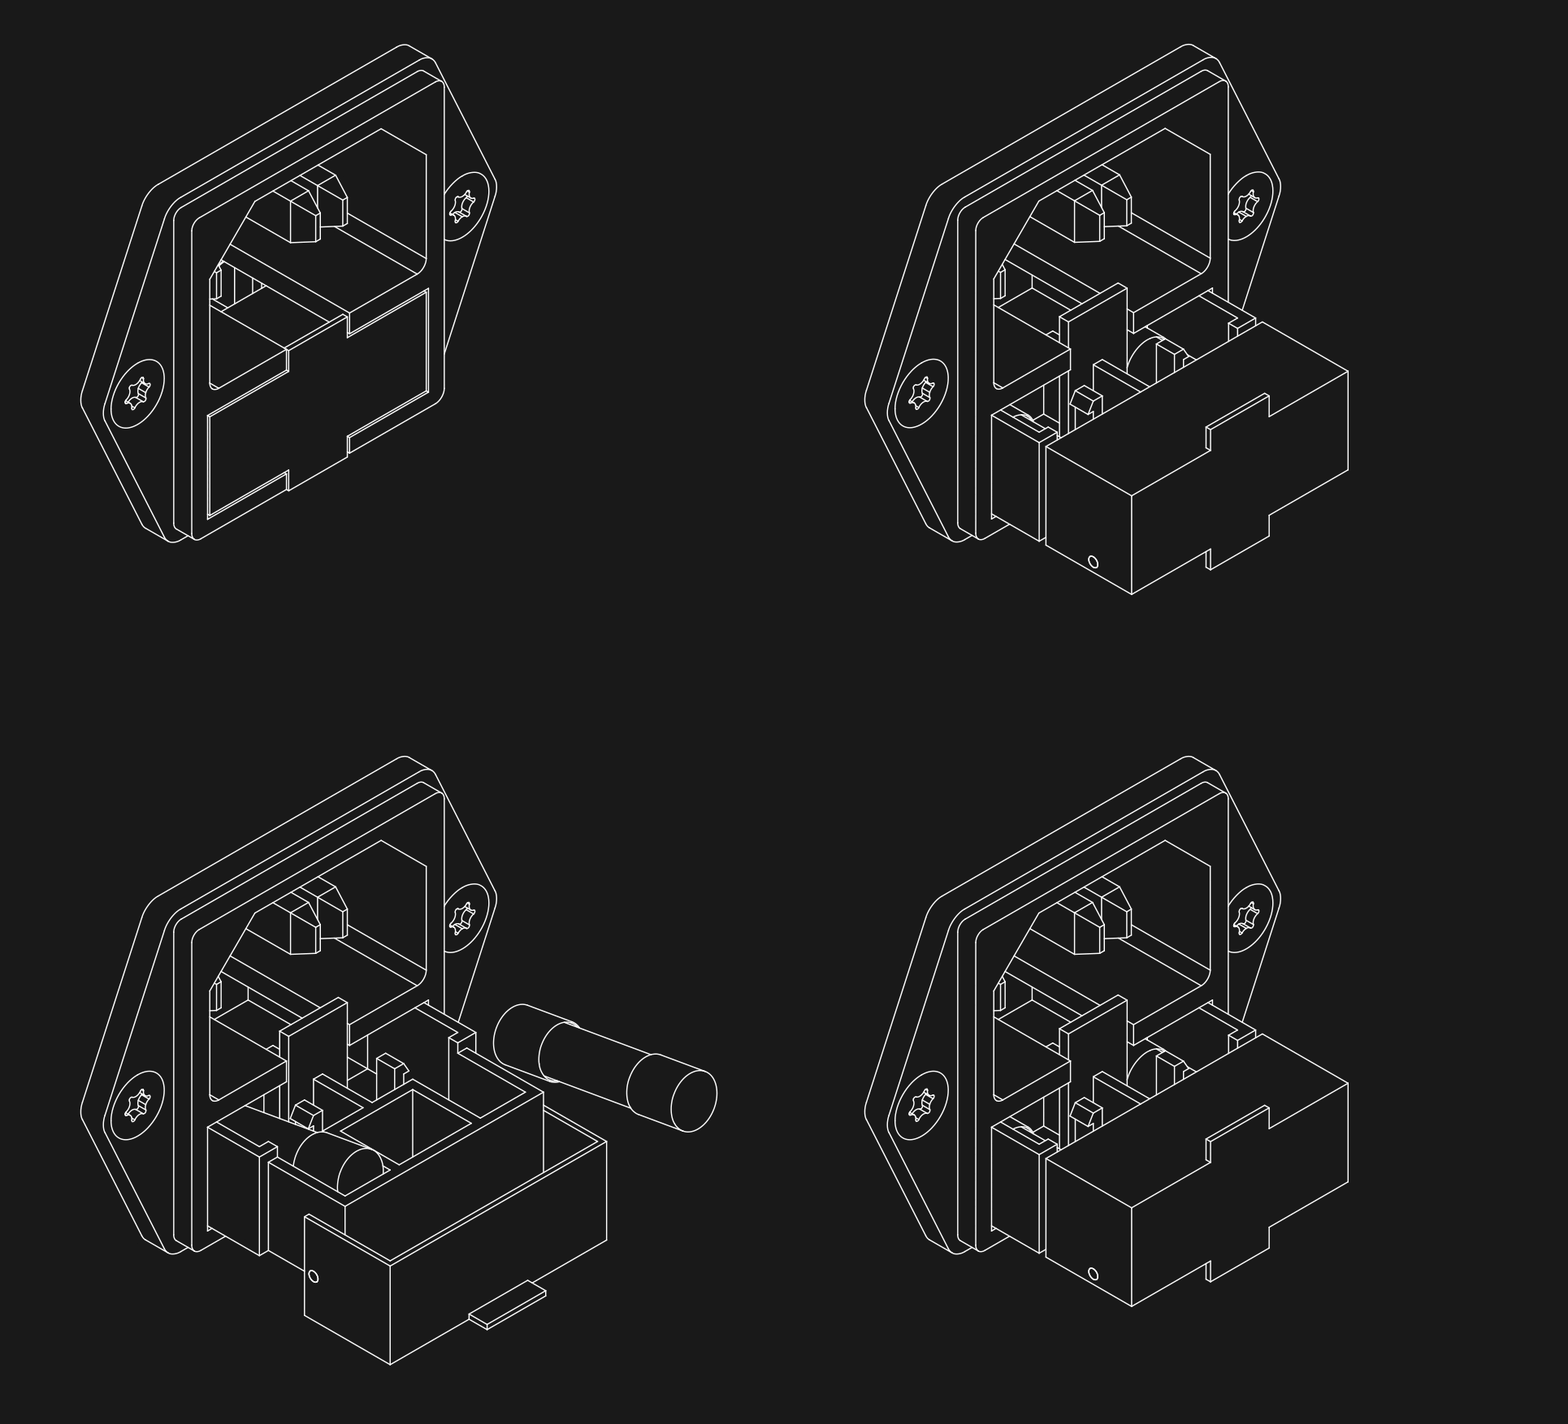
The two mains fuses are located close to the power switches and can easily be replaced if needed.
IMPORTANT! Only use 250V fuses.
IMPORTANT! Always turn off the amplifiers, disconnect the power cords and let the amplifiers cool down thoroughly before replacing the tubes, cleaning or dusting off the outside of the amplifiers.
Removing and replacing the fuses
1. Turn off the amplifier, disconnect the power cord and let the amplifier cool down thoroughly.
2. Open the fuse box gently by pulling it straight out (see illustration below).
3. Remove the old fuses and check if they are broken.
4. Replace the broken fuses and close the box.


